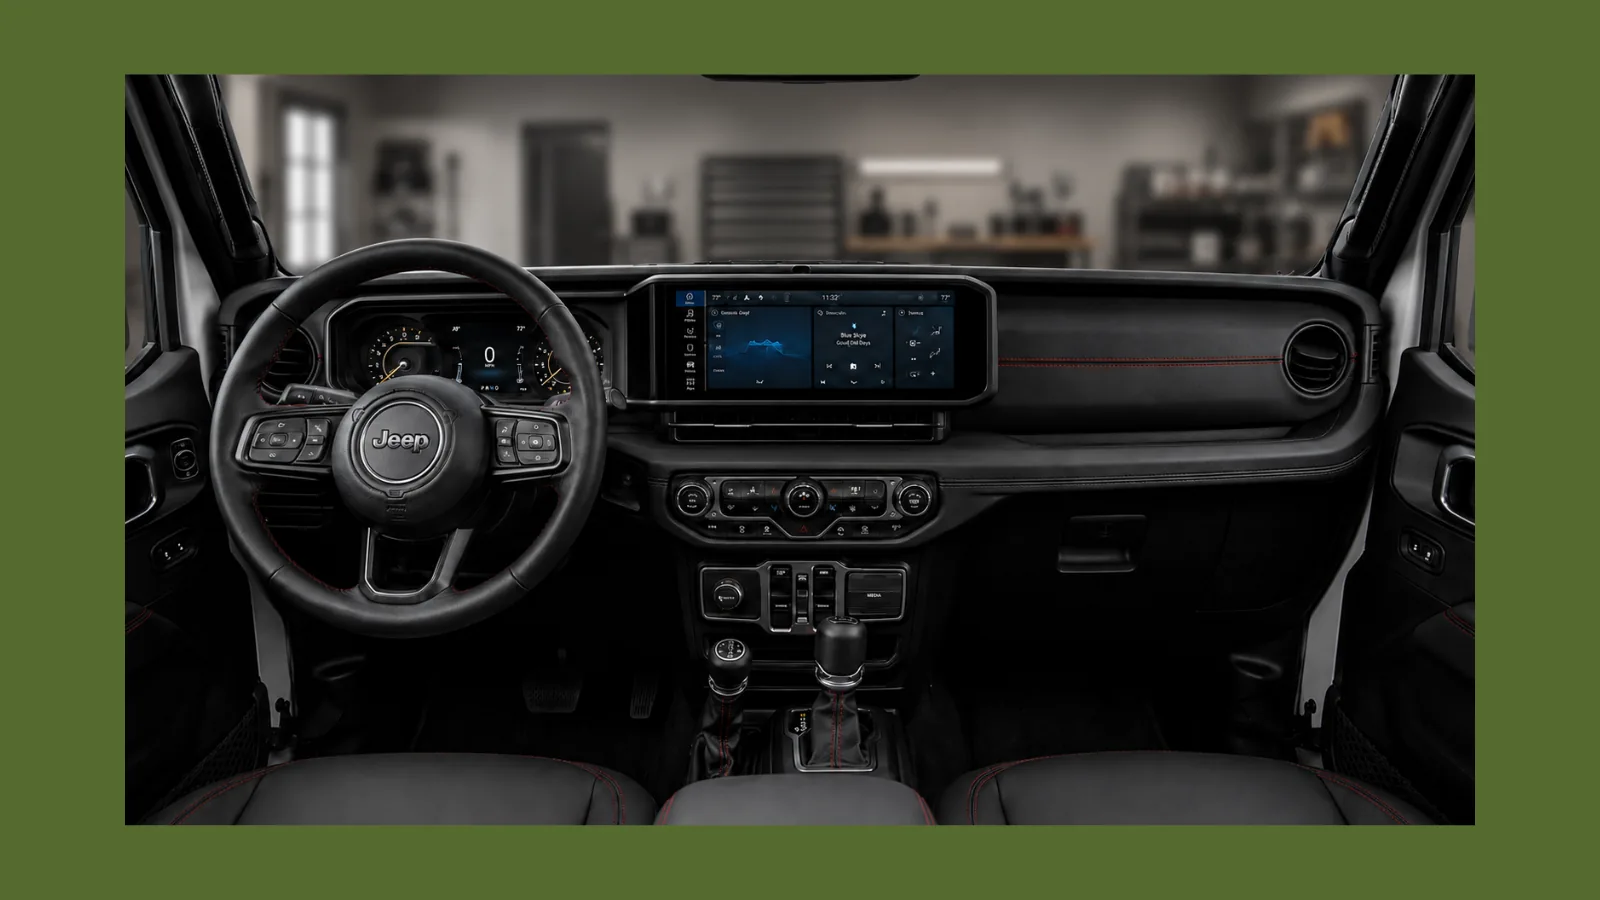
The complete Jeep Wrangler JL interior mods build order. Start here.
I know more than one Jeep JL owner who’s pulled door panels twice—once to install speakers, once to add the sound deadening they skipped the first time around. Because their Jeep JL interior mods build order was wrong, they paid for labor twice.
The right build sequence prevents exactly that: double installs, wasted money, and the frustration of undoing work you already did.
This Field Log is the Jeep Wrangler JL interior mods build order, researched and documented so you don’t learn it the expensive way.
It’s also the pillar article for Wrangler Specs’ complete Jeep Wrangler JL interior mods and roof build series. It covers:
- The Build Order: Seven phases of the complete Jeep Wrangler JL interior and roof system, in the sequence that prevents rework.
- Product Comparisons: Tables with current starting prices.
- Budget Roadmaps: The $900 Fast Start and the $2,000 Transformation Blueprint.
- Build Paths by Use Case: Daily driver, trail, overland, and dog owner.
- All Deep-Dive Field Log Links: For this Wrangler JL cabin and roof build series.
The Jeep JL Interior Mods Build Order at a Glance
The most expensive Jeep JL mistake is doing all the best mods, but in the wrong order. Here’s the correct Jeep JL build order—each phase builds on the last and locks in the one before it:
- Phase 1: Security—Console safe and top-specific security before anything else goes in
- Phase 2: Seat Covers—Protect the factory seats before they wear out
- Phase 3: Sound Deadening—Do this before audio; it can’t be undone without pulling panels again
- Phase 4: Cockpit Organization—Dash bar, phone mount, grab handles, floor mats
- Phase 5: Cargo + Rear Storage—Drawer system, cargo net, or rear platform
- Phase 6: Head Unit and Audio—Aftermarket screen for 2018–2023, speaker/amp upgrade for 2024+, always after the cabin is acoustically treated
- Phase 7: Roof Systems—ClearLidz or Sunrider for hardtop owners upgrading the Freedom Panels
- $900 Fast Start: Best first Jeep JL mods by daily impact
- $2,000 Transformation Blueprint: Full Jeep Wrangler JL interior mods transformation in phase order
Phase 1—Security: Lock It Down Before You Build It Up
Security is the most skipped Jeep Wrangler JL interior mod and the most consequential one to get wrong. Whether you need the best Jeep lockbox for daily valuables or a soft top security solution, Phase 1 is where every JL build order should begin.
A Wrangler JL isn’t a secure vehicle by default. Three vulnerabilities get exploited repeatedly:
- Soft Top Vulnerability: The fabric can be cut open in seconds with any sharp edge—no alarm trips, no broken glass, no noise.
- High Cabin Visibility: There’s no trunk. Everything inside is visible from outside the vehicle, hardtop or soft top.
- Factory Locks That Don’t Hold: The glove box tumbler turns with a flathead screwdriver. The center console has a physical key lock—but any Wrangler key opens it, and the plastic latch pries open easily.
Jeep JL security is Phase 1 because everything you add afterward—seat covers, audio gear, storage systems—becomes a more expensive loss if nothing is locked down first. This isn’t optional in the JL build order.
Hardtop Owners
If you run a hardtop, the Tuffy Console Safe is the right starting point for Jeep JL security. It installs into the factory center console—16-gauge steel, Pry-Guard locking system, 10-tumbler key, no drilling required. The lid clears the factory armrest without binding at any angle. Fits 2018–2026 JL across all trims.
If you own a JLU (4-door) with manual seats, the Lost Canyon Under-Seat Security Box adds a second secure zone under the passenger seat without touching the console. Together these two products cover all daily-carry valuables in a Wrangler JL.
Soft Top Owners
The JL console ships with locking storage as standard equipment across trims—but the lock is easily defeated, which is why Phase 1 applies regardless of top configuration. If you run a soft top, the vehicle entry point is the first vulnerability to address before any cabin investment. The console safe handles valuables. The soft top itself needs its own dedicated solution.
→ Field Log #002: Jeep Wrangler JL Security: 3 Methods That Actually Work
Security Products
Four products cover Jeep JL security. The right choice depends on door count, seat type, and what you need to secure. Note that the only product here with significant fitment restrictions is the Lost Canyon—read the warning below before ordering.
| Product | Price | Fits 2-Door JL | Best For | Notes |
|---|---|---|---|---|
| Tuffy Console Safe | from ~$230 | Yes—all JL trims | Daily carry; any JL owner | No drilling; fits 2018–2027 JL |
| Lost Canyon Under-Seat Box | from ~$180 | NO—JLU 4-door only | JLU owners; second secure zone | Manual seats only; not for 2-door JL |
| Vaultek VS10i | from ~$229 | Yes—cable tether | Firearm storage; biometric access | No console trade-off |
| Generic OBD Lock | from ~$25 | Yes | Relay attack prevention | Physical barrier only |
Phase 2—Jeep JL Seat Covers: Protect the Seats Before You Wreck Them
The Wrangler JL comes with cloth seats on Sport and Sport S trims. UV exposure through the hardtop freedom panels starts degrading the fabric within the first summer. On a daily driver, stains and wear accumulate faster than most owners expect. Replacing a factory cloth seat correctly starts at $800—more than any seat cover on this list.
Seat covers are not an accessory, they are protection for a surface with a real replacement cost. For Jeep Wrangler JL interior mods, Phase 2 carries the highest cost consequence if skipped. The best Jeep JL mods done out of sequence cost money twice.
Sahara and Rubicon trims ship with upgraded fabric and available leather; the urgency is lower but the seat cover options below apply to all JL trims.
Choosing the Right Jeep JL Seat Cover
The most common Jeep JL seat cover mistake is buying the wrong product for your actual use case. The second: ordering without confirming your trim and seat configuration first—especially for 2024+ owners.
For a daily-driven JL that sees any trail use, Bartact seat covers for the Jeep JL Mil-Spec are the best Jeep JL seat cover recommendation. 1000D Cordura nylon with waterproof polyurethane backing, triple-stitched at stress points, MOLLE panels built in—made to order for your specific JL trim. They fit like a second skin, which means installation takes patience but the cover does not shift. Three-plus years of daily use in, owners consistently report they still look new.
For a full fitment breakdown by trim, including the 2024+ seat back redesign that catches owners off guard, the Wrangler Specs JL Seat Cover Spec Sheet covers every Jeep Wrangler JL configuration in detail.
Seat Cover Products
Five Jeep JL seat cover products across three material categories. The right one depends on climate, use case, and how long you plan to keep the JL:
| Product | Material | Price (Front Pair) | Airbag OK | Use Case | Notes |
|---|---|---|---|---|---|
| Bartact Mil-Spec (JL 2-door) | 1000D Cordura, MOLLE | from ~$470 | Yes | Long-term, daily/trail | Separate SKU for power-seat 2024+ trims only. Manual-seat 2024+ uses the 2018–2023 covers |
| Bartact Mil-Spec (JLU 4-door) | 1000D Cordura, MOLLE | from ~$470 | Yes | Long-term, daily/trail | Separate SKU for power-seat 2024+ trims only. Manual-seat 2024+ uses the 2018–2023 covers |
| Wet Okole Neoprene (JL) | Neoprene | from ~$200 | Yes | Wet/dirty/budget | Machine washable; can feel warm in direct sun |
| Saddleman Neoprene (JL) | Neoprene | from ~$180 | Yes | Budget waterproof | |
| Katzkin Leather (JL) | Leather | from ~$800 installed | Yes | Pavement-only, long-term | Pro install required |
→ Field Log #003: Bartact Seat Covers for Jeep JL: Worth It for Daily Driver
Phase 3—Jeep JL Sound Deadening: Do This Before You Touch Audio
This is the most commonly skipped Jeep JL interior mod—and the most commonly regretted one. At 65 mph on stock tires, the Wrangler JL cabin registers 75–80 dB of road and wind noise. Jeep Wrangler JL interior mods that skip sound deadening are building on a noisy foundation that no head unit or speaker upgrade can fix.
The 3-piece hardtop helps compared to a soft top, but the floor, doors, and firewall arrive with minimal acoustic treatment from the factory.
Jeep JL sound deadening must happen before audio in the build order. It is the Wrangler JL interior mod with the fewest second chances—once the head unit and speakers are in, pulling door panels to add deadening is a two-job process. Do it once. Do it in order.
Jeep JL Sound Deadening: Application Priority
Apply Jeep JL sound deadening in this order for maximum impact per dollar spent. The sequence matters almost as much as the materials:
- Floor: Largest surface area, highest single-zone impact on overall cabin noise—always start here
- Doors: Inner door skin closes the biggest acoustic gap in the cabin
- Firewall: Engine noise bleed; more noticeable on the 2.0L 4-cylinder eTorque
- Hardtop Headliner: HotHead Headliner is the 3-piece specific solution—thermal and acoustic combined. Mopar also offers an OEM hardtop headliner for owners who prefer factory fitment
- Wheel wells: Road noise from tire contact; often skipped, but effective at highway speed
Sound Deadening Products
Five Jeep JL sound deadening products cover the three highest-impact zones. Most JL owners doing this right need two of these, not one.
The practical starting point for Jeep JL sound deadening: Kilmat 80 mil on the floor and inner door skins, plus the HotHead Headliner if running the 3-piece hardtop. That combination covers the three highest-impact zones for a Jeep JL sound deadening job, pricing broken out by door count in the $2,000 Blueprint table below. Use the 80 mil over the 50 mil—the difference is audible at highway speed.
→ Field Log #004: Jeep JL Sound Deadening: Quiet the Cabin at Highway Speed
Phase 4—Wrangler JL Cockpit Organization: The Daily Setup
Phase 4 Jeep JL interior mods are what most owners buy first and what most get wrong.
A universal phone mount that rattles loose on the first trail. Grab handles that don’t fit the JL roll bar diameter, or worse, interfere with a 2024+ airbag. Floor mats that shift under hard braking. The right cockpit setup costs roughly the same as the wrong one. It just requires knowing what to buy first.
The Jeep JL cockpit is what you interact with on every single drive. These are the daily driver mods for usability, the category where getting it right once is worth more than getting it cheap twice.
2018–2023 JL: Two distinct mounting philosophies exist for this platform. The Rugged Ridge Gear-Vise Dash Bar spans the full dash width and is the right call for owners running multiple devices, tablet, radio, phone, and camera together. For a cleaner, single-device setup, the BulletPoint RubiGrid bolts directly into the factory top-dash tray without a full crossbar. The Tackform Enduro Series Bar Mount clamps to the Gear-Vise or any generic 7/8-inch bar. Tackform sells this clamp in several bar diameters, confirm you’re selecting the 7/8-inch version specifically.
2024+ JL: The Vector Offroad EDock is the purpose-built no-drill solution for the 2024+ dash geometry. Tackform’s grab handle mount works across all JL model years as an alternative that avoids the dash entirely.
One fitment note on floor mats: 2-door JL trims typically come with front mats only, while 4-door JLU trims add rear mats. Factor that into which liner set you order.
A Note on Cockpit Sequencing
Before buying a phone cradle, choose your dashboard philosophy: Full Bar or Tray Grid. Full-width dash bars are the right call for overland rigs managing multi-device layouts, radios, tablets, and cameras running simultaneously. For a cleaner, minimalist setup centered around a phone and a GoPro, a compact tray grid is often the better choice. Either way, secure the platform first, then match the mount to it.
Cockpit Products
| Product | Price | Category | Notes |
|---|---|---|---|
| Rugged Ridge Gear-Vise Dash Bar | from ~$225 | Dash Bar | A-pillar mount, no drilling. 2018-2023 JL only. 7/8-inch steel backbone, full dash width. Best for multi-device setups running tablet, radio, and camera together. Single phone owners may prefer a tray grid instead. |
| BulletPoint RubiGrid | Confirm at bulletpointmount.com | Dash Bar | Compact tray grid that bolts into the factory top-dash tray. No full-width bar. Top-tier no-drill option for owners who want a cleaner, minimalist cockpit layout centered around one or two devices. |
| Vector Offroad EDock | Confirm at vectoroffroad.com | Dash Bar | Purpose-built for 2024+ JL/JLU/4xe. 1-inch steel, bolts to internal dash structure, no drilling. The confirmed no-drill solution for the 2024+ dash geometry. |
| Tackform Enduro Series Bar Mount | from ~$60 | Phone Mount | Rail-clamped, trail-rated. Mounts to Gear-Vise or any 7/8-inch bar. 2018-2023 JL. Requires a 7/8-inch bar, will not fit the 1-inch Vector EDock without a different clamp. |
| Tackform Grab Handle Mount | from ~$60 | Phone Mount | Mounts to roll bar grab handle bolts. Works across all JL model years including 2024+. |
| GPCA GP-Grip PRO | from ~$60 | Grab Handles | Correct JL roll bar diameter. Fits 2018-2023 JL/JLU. Sky One-Touch owners on this model year need the separate GP Grip LITE Universal, not this product. Confirm inventory at gpca.com. |
| GPCA GP-Grip Air | from ~$50 | Grab Handles | Airbag-safe design for 2024+ JL. Not compatible with Sky One-Touch, GPCA recommends their GP Back Grip PRO instead for that roof. Requires a Torx tool to install, not tool-free like the older GP Grip PRO. |
| Bartact Universal Wrap-Around | Confirm at Bartact | Grab Handles | Made-in-USA paracord option for 2018-2023 JL. Built for the pre-airbag roll bar, not intended for 2024+. |
| Bartact Bolt-On Paracord | from ~$50 | Grab Handles | Airbag-safe paracord design for 2024+, works across model years. Uses factory Sky One-Touch mounting holes. Does not fit manual soft tops. |
| NXTGEN Cross Terrain | from ~$50 | Grab Handles | Magnetic stow-away system, carbon steel and aircraft-grade aluminum. Airbag-safe and works with Sky One-Touch. Available for both 2018-2023 and 2024+. |
| Mopar OEM Grab Handles | Check dealer for pricing | Grab Handles | Two different rear-handle versions exist. An older discontinued version does not fit 2024+ or Sky One-Touch. The current redesigned version is confirmed compatible with both by Mopar's own parts stores. Confirm you're ordering the current design. |
| WeatherTech FloorLiner JL | from ~$220 | Floor Mats | Laser-measured fit, high lip coverage. Confirm 2-door or 4-door configuration at weathertech.com before ordering. |
| Mopar All-Weather Floor Liners | from ~$130 | Floor Mats | Factory fitment with tire-tread pattern. Integrates with factory floor drain plugs, allows hosing out the floorboards without removing mats. |
→ Field Log #007: Best Grab Handles for Jeep Wrangler JL: Model Year and Roof Decide Fit
→ Field Log #015: Best Phone Mount for Jeep JL—No Drill, No Rattle Options (Coming Soon)
Phase 5—Jeep JL Cargo + Rear Storage: Building the Back End
The JL ships with nothing securing the rear cargo area. At highway speed, loose gear is a projectile problem. At the trailhead, nothing is where you left it. Phase 5 Jeep JL interior mods address both—and this is where the 2-door vs 4-door JL distinction matters most in the entire build order.
Full drawer systems designed for the JLU won’t fit a 2-door. The 2-door Jeep JL cargo strategy prioritizes reversibility and volume control over permanent structure. Know which rig you own before buying anything here.
Three Approaches to Jeep JL Cargo
Choose based on how you actually use the rig:
- Net + Organizers: Lowest cost, fully reversible—the right starting point for a 2-door daily driver JL
- Cargo Shelf / Platform: Mid-range, adds structure without committing to a permanent drawer system
- Full Drawer System: Premium, permanent—the overlander’s answer, mainly JLU territory
Cargo Products
Five Jeep JL cargo storage products from reversible nets to permanent drawer systems. For most 2-door JL owners, a cargo net does more practical work at a fraction of the cost of a permanent install:
| Product | Price | 2-Door Fit | Reversible | Best For |
|---|---|---|---|---|
| Goose Gear JL Plate System | from ~$1,800 | Yes (2-door kit) | No | Premium permanent overlanding build |
| Blue Ridge JLU Attic | from ~$100 | JLU only | Yes | JLU 4-door daily driver starting point |
| Xg Cargo Magellan Net | from ~$60 | Yes | Yes | Budget cargo net |
| American Adventure Labs Shelf | from ~$280 | JLU only | No | JLU mid-range structured storage |
| ARB Roller Drawer | from ~$600 | JLU only | No | JLU overlanding |
→ Field Log #005: Jeep JL Rear Seat: Dog Setups That Hold Up
→ Field Log #014: Best Cargo Net for Jeep JL—What Actually Stays Put at Speed (Coming Soon)
→ Field Log #017: Best Drawer System for Jeep JL—Ranked for Daily Drivers and Overlanders (Coming Soon)
Phase 6—Jeep JL Head Unit and Audio: Know Your Model Year Before Spending
The head unit situation on the Jeep JL splits cleanly by model year and getting this wrong is an expensive mistake that no amount of research after the fact will undo.
2018–2023 JL: Ships with a 5-inch, 7-inch, or 8.4-inch Uconnect screen depending on trim. The 5-inch and 7-inch trims feel dated by current standards: small screens, no wireless CarPlay, limited functionality. A head unit upgrade is a meaningful Wrangler JL interior mod for this generation, and Phase 6 is the right time—after sound deadening, because a properly deadened cabin improves the performance of any audio system installed into it. The Stinger HEIGH10 and HEIGH10+ are the most established options for 2018–2023 JL owners. The Alpine i509-WRA-JL is the audio-first alternative.
2024+ JL: Ships with the 12.3-inch Uconnect 5 as standard across all trims. The screen is already competitive, as the Jeep JL head unit upgrade conversation changes entirely for this generation. The weak point on 2024+ is the audio system output, not the screen. Speaker and amplifier upgrades are the right Phase 6 Jeep JL interior mod for 2024+ owners.
2024+ navigation note: If your Sport or Sport S shipped without built-in navigation, the Mopar UBX GPS Navigation Upgrade (the Uconnect 5 NAV module) activates OEM navigation on the existing 12.3-inch screen with wireless CarPlay and Android Auto. Plug-and-play, no screen replacement required. Confirm current pricing and availability at Infotainment before ordering.
Head Unit Products
The table below covers head unit options for 2018–2023 JL owners only. If you own a 2024+ JL, your factory screen is already 12.3 inches—skip this table and focus on speaker and amplifier upgrades instead:
| Product | Full Kit Price | JL Fitment | Retains OEM Features | Notes |
|---|---|---|---|---|
| Stinger HEIGH10+ (full kit) | from ~$1,879 (Quadratec, June 2026) — verify at stingerdrive.com | 2018-2023 only — NOT 2024+ | Yes — all factory integrations | Wireless CarPlay/Android Auto. Known issue: original HEIGH10 call volume drops above ~50 mph on highway. The HEIGH10+ may address this — confirm with Stinger before ordering if call quality is a priority. |
| Alpine i509-WRA-JL | from ~$2,900 — verify at authorized Alpine retailer | 2018-2023 only (NOT 4xe) — NOT 2024+ | Yes — iDatalink Maestro, full OEM feature retention | Audio-first option. 13-band parametric EQ, 4V preamp outputs, IP53 weather rating. Best foundation for owners running external amplifiers. |
| OEM 8.4 inch Uconnect UAQ Upgrade | from ~$1600 (Infotainment) — verify before ordering | 2018-2023 OEM (5 inch or 7 inch owners only) | Yes — fully OEM | Stay in the Stellantis ecosystem. Wired CarPlay and Android Auto. Upgrading from the 5-inch base unit loses the volume knob — upgrading from the 7-inch retains it. Confirm your current screen size before ordering. |
| Alpine iLX-F309 + harness | from ~$500 | 2018-2023 — verify per year + harness | Partial — check kit spec | Budget option. Requires harness adapter. Does not retain full OEM integration. See FL #006 for purpose-built plug-and-play options with full feature retention. |
| JVC KW-M865BW + harness | from ~$300 | 2018-2023 — verify per year | Steering wheel controls; loses SiriusXM | Budget option. Requires harness adapter. Does not retain full OEM integration. See FL #006 for purpose-built plug-and-play options. |
Budget options (iLX-F309, JVC KW-M865BW) are included above for completeness. They work, but they require additional harness adapters and don’t retain the full OEM integration that purpose-built JL kits deliver. If full feature retention matters to you, the Stinger or Alpine options are the right starting point.
→ Field Log #006: Jeep JL Aftermarket Head Unit: Model Year Changes Everything
Phase 7—Wrangler JL Roof Systems: ClearLidz vs. Sunrider
Here’s something that many JL hardtop owners don’t realize until they’re about to make a purchase: the ClearLidz Jeep Wrangler Panoramic Freedom Clear Top and the Bestop Sunrider for Hardtop, both genuine Jeep Freedom Panel alternatives, solve the exact same freedom panel problems in completely different ways.
One opens. One doesn’t. Both fall into the same category, but they’re not interchangeable.
ClearLidz Panoramic Freedom Clear Top
Replaces both front Freedom Panels with fixed clear polycarbonate. The roof stays closed permanently, there’s no flip-back mechanism, no open-air option. What you get instead is natural light and panoramic visibility on every single drive, with 99.5% UV protection built into the material.
Install runs 45 to 75 minutes, a second set of hands helps with positioning, though solo installs are commonly reported too. The panel weighs about the same as a single factory Freedom Panel. Heat is the real tradeoff, a fixed clear panel can’t be shaded from direct sun once it’s installed, though ClearLidz recently launched its own SunShade accessory (~$100) to address this.
Bestop Sunrider for Hardtop
Replaces both front Freedom Panels too, but with a single fabric panel built on a frame, available in 30 oz. Black Twill or 28 oz. Black Diamond fabric, both waterproof. Installs to factory mount locations with no drilling, and the current design ships fully assembled, no Z-clip installation like older versions required. Most owners report the full install, unpacking, assembly, and mounting, takes under an hour once you’re familiar with the Z-clip-free process.
Black Twill’s 30 oz. triple-layer construction gives genuinely better sound dampening and carries a Limited Lifetime warranty; Black Diamond is the lower-cost, single-layer option with a 5-year warranty. An optional SunScreen mesh shade (~$200) filters light while flipped back. One naming note: Mopar sells this same product through its own OEM parts channel, Bestop manufactures it either way, Mopar’s version just carries Jeep-specific branding and typically costs more for the identical top.
| Product | Price | Opens the Roof | Best For |
|---|---|---|---|
| ClearLidz Panoramic Freedom Clear Top | from ~$1,500 | No, stays closed | Daily drivers who want natural light and visibility without ever thinking about weather |
| Bestop Sunrider for Hardtop | from ~$800–$1,000 | Yes, folds back fully | Open-air driving on demand, hardtop owners who want the topless feel without removing the top |
→ FIELD LOG #009: ClearLidz vs Sunrider for Jeep JL: Which Panoramic Option Wins
The $900 Fast Start: Best First Jeep JL Mods in Order
New JL, limited budget, not sure which Jeep JL interior mods to do first? This table cuts through the noise and prioritizes by daily impact, not by what looks most impressive on Instagram, but by what changes every single drive:
| Priority | Product | Approx. Price | Why It's First |
|---|---|---|---|
| 1 | WeatherTech FloorLiner JL (2-door full set) | from ~$220 | Permanent floor protection, install day one, before anything else touches the carpet. |
| 2 | Tuffy Console Safe | from ~$230 | Security before anything of value goes in the Jeep. |
| 3 | GPCA GP Grip PRO 2-pack (front or rear) | from ~$60 | A grip point on nearly every drive. |
| 4 | Rugged Ridge Gear-Vise + Tackform (2018-2023) or Vector Offroad EDock (2024+) | from ~$300 / from ~$100 | No-drill cockpit foundation most other mounts attach to. Not the same product across model years, confirm yours. |
| 5 | Blue Ridge Overland Gear JLU Attic (JLU only) or Mopar Cargo Net (2-door) | from ~$100 / from ~$50 | Keeps gear contained at speed. The Blue Ridge Attic does not fit the 2-door JL, confirm your door count before ordering. |
| Total | ~$910 | Final total varies by JL model year, door count, and product choices. |
For a full breakdown of every product in the $900 Fast Start—each one covered in complete detail:
→ Field Log #008: Best First Mods for Jeep Wrangler JL: $900 Fast Start
The $2,000 Jeep Wrangler JL Interior Mods Blueprint
The $900 Fast Start covers the essentials. The $2,000 Transformation Blueprint covers all six phases, adding seat covers and full sound deadening to the build. Pricing runs $1,750 to $1,940 depending on door count, both comfortably inside the $2,000 ceiling.
| Phase | Product | Approx. Price | Notes |
|---|---|---|---|
| 1—Security | Tuffy Console Safe | from ~$230 | First install, before anything of value goes in. |
| 2—Seat Covers | Bartact Mil-Spec (2-door or JLU front pair) | from ~$470 | Same price both door counts, confirm the correct door-count SKU. Power-seat 2024+ trims need a separate SKU; manual-seat 2024+ uses the 2018–2023 covers. |
| 3—Sound Deadening | Kilmat 80 mil + HotHead Headliner | from ~$420 (2-door) / ~$560 (JLU) | HotHead is a separate SKU by door count, confirm yours before ordering. |
| 4—Cockpit | Gear-Vise + Tackform + GPCA GP-Grip PRO | from ~$360 | Full no-drill cockpit setup, 2018–2023 only. 2024+ substitutes Vector Offroad EDock and GPCA GP-Grip Air. |
| 5—Floor Mats | WeatherTech FloorLiner JL | from ~$220 | Separate kit per door count. |
| 6—Cargo | Mopar Cargo Net (2-door) or Blue Ridge JLU Attic (JLU) | from ~$50 / ~$100 | Blue Ridge does not fit the 2-door JL. |
| Total | ~$1,750 (2-door) / ~$1,940 (JLU) | Both configurations land under the $2,000 ceiling. |
→ Field Log #10: Jeep Wrangler Interior Upgrades: The 2,000 Transformation Blueprint
Build for Your Use Case: Jeep JL Mods by How You Drive
The Wrangler JL build order above is calibrated for a daily-driven JL. But the best Jeep JL mods for a weekend trail rig are not the same as the best Jeep JL mods for a dog-hauling daily driver. Here’s how the priority sequence shifts:
Daily Driver / Mostly Pavement
- Security first—console safe before any Jeep Wrangler JL mods go in
- Seat covers and cockpit organization before any trail-specific Wrangler JL mods
- Head unit (or audio upgrade on 2024+) ranks higher here—you’re on it every single drive
- Phase 7 roof is relevant for hardtop daily drivers—ClearLidz is a genuine daily comfort upgrade
- Katzkin leather viable if long-term ownership and zero trail use
- Skip rock sliders until the JL actually leaves pavement
Trail / Weekend Warrior
- Security first, then grab handles—then Jeep JL cargo storage before audio
- Floor mats first; protecting against trail debris on every outing
- Exterior mods move up faster here—rock sliders may be more urgent than Phase 6
- Skip Katzkin entirely—Bartact seat covers for Jeep JL or Wet Okole
- Phase 7 roof is lower priority for trail use—hardtop integrity matters more than panoramic light
Overland / Light Expedition
- Security first, then Jeep JL cargo drawer—then Wrangler JL sound deadening—then roof rack (exterior territory)
- Head unit with offline maps: Stinger HEIGH10 for 2018–2023 JL; verify current options at stingerdrive.com for your model year
- Dual battery planning starts here—covered in a dedicated Field Log
- Interior organization before gear accumulates. A drawer system before a light bar.
Dog Owner
- Floor mats immediately—then cargo net or rear seat delete plus dog platform
- Bartact seat covers for Jeep JL with MOLLE if the dog rides front
- Goose Gear plate system if dogs live in the back—the benchmark JL platform for this use case
- Sound deadening becomes relevant if significant highway miles are part of the routine
When You’re Ready for Exterior Wrangler JL Mods
Jeep JL interior mods and Wrangler JL cabin upgrades are the right place to start—they affect every drive and require no lift, no alignment, no shop visit. Once the complete Jeep Wrangler JL interior mods build order is done, exterior Wrangler JL mods follow a clear sequence:
- Rock sliders—rocker protection applies to daily drivers and trail rigs equally
- Underbody skid plates—becomes urgent the first time you leave pavement
- Bumpers—front first; changes recovery options and light mounting
- Roof rack—opens up RTT, auxiliary lighting, and cargo transport
- Lighting—ditch lights, A-pillar pods, or light bar depending on use case
→ Field Log #29: Jeep JL Exterior Upgrade Checklist—Trail-Ready Build Order (Coming Soon)
→ Field Log #30: Jeep JL Full Build Guide—Interior + Exterior from Start to Finish (Coming Soon)
Build it right once. Know what to upgrade next. These are the Jeep Wrangler JL interior mods that make the difference—in the order that actually works.
If you want the full brand-by-brand breakdown across every build phase, you’ll find confirmed Jeep JL aftermarket brands by category on the Parts Directory.
If you plan to have a shop handle any of your Jeep Wrangler JL interior mods—seat covers, audio, storage build—the Wrangler Specs Builder Directory lists vetted Jeep JL installers by region:
Related Field Logs: Jeep Wrangler JL Cabin and Roof Build Series
Every phase above links to a dedicated Field Log with the full breakdown. These are the next articles in the Wrangler JL mods series:
| FL # | Field Log |
|---|---|
| FL #002 | Jeep Wrangler JL Security: 3 Methods That Actually Work |
| FL #003 | Bartact Seat Covers for Jeep JL: Worth It for a Daily Driver? |
| FL #004 | Jeep JL Sound Deadening—Quiet the Cabin at Highway Speed |
| FL #005 | Jeep JL Rear Seat Delete: Dog Setups That Hold Up |
| FL #006 | Jeep JL Aftermarket Head Unit: Model Year Changes Everything |
| FL #007 | Best Grab Handles for Jeep Wrangler JL: Model Year and Roof Decide Fit |
| FL #008 | Best First Mods for Jeep Wrangler JL: $900 Fast Start |
| FL #009 | ClearLidz vs Sunrider for Jeep JL: Which Panoramic Option Wins |
| FL #010 | Jeep Wrangler Interior Upgrades: The $2,000 Transformation Blueprint |
| FL #011 | Seat Jackers for Jeep JL: Every Seating Fix Compared |
| FL #012 | Katzkin Leather vs Bartact for Jeep JL—Is Leather Worth It? (Coming Soon) |
| FL #013 | Best Sun Shade for Jeep JL—Options That Don't Look Terrible (Coming Soon) |
| FL #014 | Best Cargo Net for Jeep JL—What Actually Stays Put at Speed (Coming Soon) |
| FL #015 | Best Phone Mount for Jeep JL—No Drill, No Rattle Options (Coming Soon) |
| FL #016 | Jeep JL Water Leak Fix—Why the Carpet Stays Wet After Rain (Coming Soon) |
| FL #017 | Best Drawer System for Jeep JL—Ranked for Daily Drivers and Overlanders (Coming Soon) |
| FL #018 | Jeep JL Dash Storage—5 No-Drill Mods That Actually Work (Coming Soon) |
| FL #019 | Jeep Soft Top Theft Prevention—What to Do After a Break-In (Coming Soon) |
| FL #020 | How to Vet a Jeep JL Builder—Before You Spend Thousands (Coming Soon) |